31 March 2017

Coming next week...

STITCHAPALOOZA!

Mr. Wonderful is going TDY next week. I will be completely unsupervised. I have made plans. Y'all must come over. I'll be doing stuff.

Stitching (color conversion!)... 

Crafting...


Finishing...

Maybe even some tiny baking...

See ya Monday!

27 March 2017

Cozy Basket Day

It was nearly 80 degrees on Saturday, and 45 and raining on Sunday... a cozy basket day.


It was also a good day for stitching. Here's my progress on Sleeping Fox.

20 March 2017

I think I'm re-set!

I have another little finish! I started this back in January and then abandoned it when I got sidetracked by my annual winter household purge. I mentioned a couple of posts ago that I sometimes do a small "re-set" project to get myself back into the routine of taking time to stitch, and I showed that finish in my last post. This is Little House Needleworks Season's Greetings. I think it's mostly stitched as recommended; I think I substituted the brown and the off-white for what I had on hand, but it doesn't make much difference in the look.

Now that I've finished that, I plan to go over my stitching to-do list--which is now a smoking ruin of failure--and "reschedule" some of my projects in an attempt to salvage the rest of my  stitching year! Since March is more than half gone, I'm thinking about devoting the rest of this month to finishing up Sleeping Fox. I'm not sure I can finish him in two weeks, but it's pretty easy stitching (large blobs of color), so perhaps I can. Here's where he is now:

Now watch, y'all. I'll get my projects all rescheduled, I'll get back on track, I'll be flying along... and we'll get orders. And I'll have to drop everything and move. But I won't think about that today. Today I'll just enjoy working on Sleeping Fox.

Happy Stitching!

16 March 2017

Spring Kitties

I finally have a little stitching to show! This is my "re-set project" that I mentioned a few days ago, a cute spring freebie available here. My version of Pussy Willow Egg is stitched on a scrap of 28 ct. Provence Lavender linen. The kitties are stitched with Wisper 101 to make them fuzzy, and the egg is stitched with Classic Colorworks Snips & Snails, for an Easter eggy look.


14 March 2017

Fiberlicious!

I was recently pointed in the direction of a new-to-me company called Fiberlicious and I decided to order a small piece of fabric and a few threads to give them a "test drive."

Oh. my.


Needless to say, I will be ordering from them again. Absolutely beautiful colors and only a two-week wait for my dyed-to-order threads and fabric. 

In other news...

December: no snow

January: no snow

February: no snow

March:

Snow and ice. Yay, spring!

11 March 2017

Saturday Sampler: Stash Update Edition

I fell a little behind in stash updates, so today I'm catching up. 

First, from Sandra in South Carolina's magazine de-stash, three beautiful fox charts! Thank you, Sandra! Aren't they lovely?

From Ann in Ohio's de-stash, more great charts! Thank you, Ann!

From Market Day at my LNS, Dog Pile from Ink Circles. I love this.

And a gorgeous limited edition green from GAST, Juniper.

Here are a few things that have arrived in the mail over the last several weeks. I love the bright colors in the Small Animal Sampler. I'm visualizing it on a chocolate brown linen, though. 

My hoard of Russian kits is growing...

And here are some supplies I've pulled together for a "re-set project." Do y'all do re-set projects? I have completely gone off the rails on my stitching so far this year (busy with other things). Have y'all noticed that in all my posts this year, only a few of them have actual, you know, stitching in them? And those were back in January. Sometimes when I get off track, it helps get me going again to pick up a small, quick project that I can whip out in a couple of sittings. A quick finish gives me a little instant gratification and eases me back into WIPs where a finish is further off. Maybe I'll settle down and stitch and have a cute finish to share in a few days! Soft spring colors should be just the thing!

Bonus: Tiger Lily!

Happy Stitching!

06 March 2017

Craftastic Weekend: Tea Box Bookmarks & Needle Minders

I spent the entire weekend crafting as a reward to myself for having completed a huge purge of my sewing room, and I feel ready to tackle my next big purge project: my closet!

I made a few tea box bookmarks for Ann in Ohio, who has been so graciously sending me wonderful charts from her de-stashing. She sent some tea boxes, and I converted them to bookmarks for her.


I also made The World's Most Adorable Needle Minders from The World's Most Adorable Buttons, which are available here. 

Look at the adorableness! Look at it! The little dresses and overalls! *sigh* I ran out of magnets so I couldn't make minders out of the bunny and the mouse, but I wanted to show the whole set. I can't handle the cuteness. Just can't.

So, my Craftastic Weekend was a success. I finished some projects that have been on my to-do list for a while, and all that playing rejuvenated me and now I'm ready to get back to work. I do have one more creative project in the works, but it's going to take a few days. Maybe I'll tackle that one next weekend.

If it's been a while since you've glued your fingers together, it might be time for your own Craftastic Weekend!

05 March 2017

Craftastic Weekend: Stitcher's Tool Set

Welcome back! I'm in the midst of a crafting weekend--see yesterday's post to get caught up!

Today's project is a combination of a few little tools I've shown how to make before, but this time, I've used beads to make a coordinated set: needle minder, needle threader, and maid-of-all-work. A set like this would make a pretty, useful, inexpensive gift for a stitcher, but it makes a nice treat for yourself, too. These tools are all very easy to make and don't require a mess of supplies.


What you'll need:


*beads: medium to large, flattish beads work best

*large needles: size 22 is about right, and should fit most beads
*very strong magnets: I use the 6.3 mm Neodymium magnets from Michael's
*needle threaders
*32 gauge jewelry wire
*super glue of choice


There's nothing to making a needle minder or a maid-of-all-work. For a needle minder, glue a magnet on the back of whatever you're using for your minder. For a maid-of-all-work, glue a large needle into a bead. That's it. Easy.

For a needle threader, you can use this super easy method, or you can get a little fancier (but not much) by doing it the way I'm about to show.  For homemade needle threaders, your best friend is the inexpensive metal threader that comes three to a package. They can be deconstructed to suit your purposes and that is a lot easier than fiddling with trying to shape a wire threader on your own. You can also use very fine nylon, but I prefer metal threaders.

Snap off the end with the threader. (Save the remainder! It makes a handy little scraper for tidying up super glue and hot glue without sacrificing your fingers!)

Remove the threader.

Raid your Mill Hill stash and slip a seed bead onto the threader to hold its shape.

Tie a knot with the jewelry wire, just above the seed bead.

Thread both ends of wire through the main bead, and through another seed bead or spacer bead, depending on the size of the holes in the main bead (some are so large a seed bead will slip through, requiring a spacer bead). Tie off the wire tightly. Trim the ends very closely and glue a slightly larger bead (like the spacer beads shown in the strings above) over the knot and wire ends.


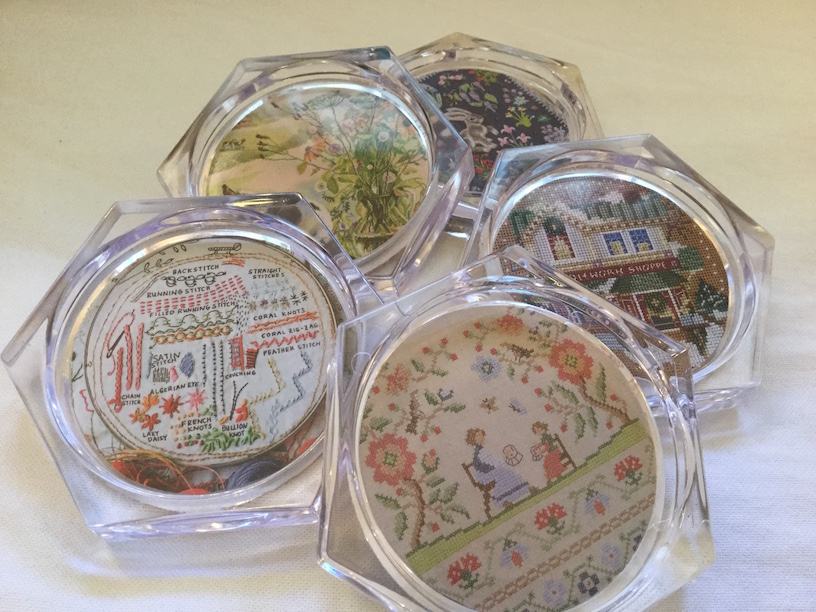
That's all there is to it. Here are a few Stitcher's Tool Sets I made. 


Back tomorrow with more!

04 March 2017

Craftastic Weekend: Sewing Room Coasters

Y'all. 

I have just finished a truly epic purge of my sewing room. Cookies for everyone. I have let go of things I've been holding onto for years, nay, decades. I would run around the neighborhood screaming my triumph, but it's freezing out there. I've been working on this purge off and on since the beginning of the year, and because I didn't want to get sidetracked and contribute to the chaos I already had on my hands, I have resisted the urge to make stuff. In fact, I haven't made anything since before Christmas. So, as a reward for finally finishing this giant task, I've decided to spend the next few days just makin' stuff. You know me--nothing elaborate or complicated, just fun. Let's go!

Today's project: ridiculously easy, but charming (at least to me!) little coasters for my sewing room. Now, I have had these acrylic coasters for, oh, probably 20 years. Why have I had them all these years and never done anything with them? Well, when I bought them, I'm pretty sure I had ideas about stitching them up, but then there's the never-ending quest for the perfect designs and somehow I just never got around to them. In later years, I figured out that I don't like the smushed stitches look that you sometimes get with these coasters, so they just slept quietly in my stash, waiting for me to be smart enough to figure out how to use them. I finally did. A solution so obvious it hadn't occurred to me before. All you need is some acrylic coasters, an old needlework catalog, and some quilt batting. 


I'm so happy with these. I mean, they're so simple and not terribly creative, but just the fact that I've finally fixed up these silly things after all these years, and that they're actually kinda cute, makes me happy. One problem: I'm a little too happy with them. Meaning: I want more. Fox ones, fall ones, Christmas ones. You see the problem. One does not need 20 coasters. 

But maaaaaybe, one does...

Stay tuned for the next few days!