What?! Ten posts in one month? That's crazy talk. It kinda makes me look way more productive than I've actually been, stitchy-wise. My current obsession is to catch up on the Brooke's Books Advent Animal freebie series. I was all proud of myself that I finally finished #2 in the series, and the very next day she posted #6--which, if you haven't seen it, will crack you up.
Here's Peter Polar Bear, with a slightly re-designed sweater.
I'm working on Mary Mouse (#3) today and hope to have her finished soon. It's August tomorrow, and that's when the Halloween stitching bug really gets me, so hopefully I'll be moving on to some of that soon. Meanwhile, it's funny little Christmas animal stitching for me.
RASK is a Random Act of Stitchy Kindness (yes, I just made that up). After seeing a message board post where I mentioned Mr. Wonderful's deployment (he's home now), Sharon in Nevada kindly offered to send him a wool helmet liner she had knitted. Naturally, we took her up on the offer, and the helmet liner arrived on Saturday. Since I don't post pictures of Mr. Wonderful, I have one of my foxes, Maid Marian, modeling his gift.
Isn't that too wonderful?! It's beautifully made and Mr. Wonderful is carried away with it.
Thank you, Sharon, from the bottom of our hearts.
And here it is--my last Cole's Quilts finish for a while. I've finished the commitment I made back in February to stitch quilt squares for six children.
Now that I have that done, I'll be getting back to my personal stitching. I think I'll first concentrate on catching up on the Brooke's Books Advent Animal freebie series. I've only got the first one done and now I'm four behind! It's amazing how quickly a month goes by, isn't it? I must be getting old.
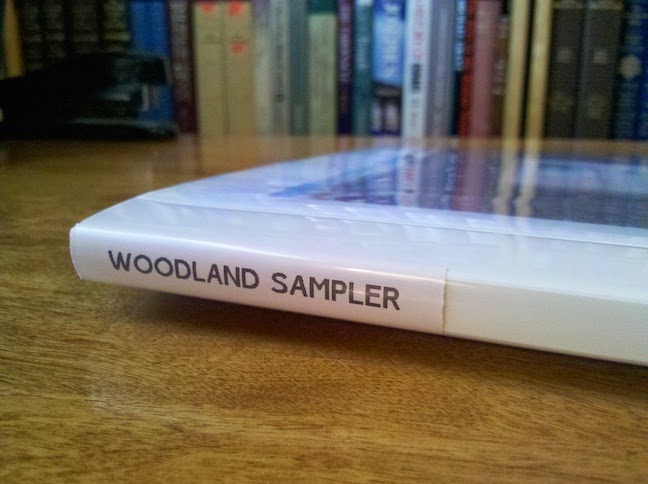
I've been playing in my stash a lot this week. Remember that really cute Woodland Sampler I downloaded a few posts ago? The PDF is 34 pages long. Yes, I know. Well, I only printed out about half of them, since both color and b/w charts were provided and I prefer b/w. Anyway, so I have this 16 or 17 page design. For someone who usually stitches smalls, this is an issue.
But I found this!
Brand: Avery. Product number: 47671. Stitchy usefulness: Awesome.
Here's my new pattern book.
With a super spiffy spine.
I love this thing. Really great for designs with lots and lots and lots of pages.
I will be hoarding these.
This weekend I'm doing a mad push to get my last two quilt squares done for my Cole's Quilts commitment. But I had to make a quick run to Hobby Lobby yesterday to pick up some white Aida. I don't stitch on Aida (except for the quilt squares), but for some reason I always think I have white Aida laying around... and of course, I never actually do.
Anyway, I was happily checking out the fall merchandise they've got out, and I found a couple of goodies--a sparkly fox (I didn't have a sparkly fox), and a teeny tiny fox cross stitch kit. See?
And then this happened:
Photobombed.
Honestly, she is the nosiest creature on the planet.
Back to the quilt squares...
I've been wanting to make a little stitched pendant for a while, and yesterday during my crime spree I picked up a pocket watch-style pendant at my LNS. I already had a fox freebie in mind to stitch for it. These pendants are available in lots of styles at most craft stores, but I particularly liked this one because it looks like an old watch case, and also because it's a bit deeper than others I've seen. That prevents the stitching from being smooshed against the glass.
This little fox stitched up quickly. I used DMC and stitched him on 30 ct. 18th c. Stone linen (R&R Reproductions).
Stitchy Supervisor says it passes inspection.
I think these stitched pendants would make really cute, interesting gifts. They work up quickly and are inexpensive and they're a nice change from the usual finishing techniques. If you're willing and able to stitch over one thread, you could create even more elaborate gifts.
Oh my. I've fallen off the wagon. Jumped off, actually. I usually don't buy much stash--a few things every few months. But yesterday? Yesterday I went wild. Wild for me, anyway. Must be stress.
So my LNS called yesterday and told me my JCS Halloween Special Collector's Issue had arrived and I went to pick it up. While I was there, a few other things jumped into my hands. Oh, and I also pre-ordered the JCS Christmas Ornament issue.
Then I stopped by Target and found this little jewelry holder to hang my stitched Halloween ornaments on this fall. I've been looking for one for a while and this one is just perfect. See the little squirrels?
Then when I got home I placed an order with Herrschners for the new issue of Cross Stitch and Needlework magazine, and also purchased a downloadable chart while I was at it.
Then I wandered over to The Stitchery and bought this adorableness.
Then while I was searching for something else, I stumbled across THIS, which is so cute I nearly passed out. Instead of passing out, I bought it.
{sigh}
Tiger Lily says, "Well, I hope you're proud of yourself."
Let's just call it Christmas in July. And July aint over yet!
It seems a lot of people have questions about how to finish perforated paper, so I decided to share the way I do it. I think the most common method is to attach the stitched piece to the backing material (paper, felt, etc.) and then cut it out, but I cut it out first as I find I'm able to get a neater cut that way.
For the backing, I like to use a heavy, textured card stock with a nice sheen on one side. It doesn't matter what paper you use, as long as it has enough body to make the finished piece nice and stiff. My mom uses old Christmas cards to back her small perforated paper Santas and it looks really nice.
Now here's where my method is a bit different from the usual way. I cut out my stitched piece first, then lay it on the backing paper and trace around it. If using a backing paper with a right side and a wrong side, make sure to trace the outline on the wrong side of the paper (i.e.. wrong side of stitching laying on wrong side of paper).
Cut out the backing about 1/8" inside the pencil line.
When cut out this way, the backing will be just the right size to cover the stitching on the back but not show from the front.
Smear a very thin layer of glue on the backing (use your finger to make sure it's smooth--no blobs), place it on the back of the stitched piece, then lay it on a flat surface and place a heavy book on it. If you haven't used too much glue, there shouldn't be a risk of it squeezing out, but if you're concerned, just place the finished piece between waxed paper before weighting it down. Leave it until it's dry.
You'll end up with a nice, neat back.
Happy finishing!
I finally got a chance to sit down and do the finishing on Peg. Here she is!
I took a few pictures while I was finishing her and hope to have a post about that in a bit. Lots of people ask about finishing perforated paper, so I thought I'd share my method. Stay tuned!