Quick Reference
- Christmas Open House 2014
- Christmas Open House 2015
- Christmas Open House 2016
- Christmas Open House 2017
- Christmas Open House 2018
- Christmas Open House 2019
- Christmas Open House 2020
- Christmas Open House 2021
- Christmas Open House 2022
- Christmas Open House 2023
- Christmas Open House 2024
- How To...
- color conversions
- finishing
19 May 2016
Finishing Spree: Update #3~How to make a template
Most of the finishing shapes I use are pretty straightforward: rectangles, squares, circles, ovals. I've done a few unusual shapes, which you can see here and here, but even those aren't very challenging, just a little different. But sometimes you have a finish that calls for some extra creativity and effort. This is a design Mr. Wonderful picked out and I stitched for him last fall. It's from the 2015 Just Cross Stitch Special Halloween Issue, and I did a brown conversion of the original (information on that is here). The outline of this design, the shape of the bat, is superb. Instead of just doing a rectangular finish, I wanted the finish to be the exact shape of the bat. That required me to make a special template. Here's how I did it.
If you're making a template for a symmetrical design, start here at the beginning. (If you're making a template for an asymmetrical design, start with the third photo and skip the folding stuff.) For a symmetrical design, the process is pretty much exactly like making Valentines out of construction paper, like you did when you were little. Remember folding your paper in half, drawing half of a heart, with the center of the heart on the fold, and then cutting it out to make a symmetrical heart? That's all I did.
First, fold the design in half. Make sure the outlines of the design line up exactly (hold it up to the light), and pin the halves together to keep them from slipping out of place.
Next, place paper over the design and sketch the shape you want. I have a small light box for projects like this, but if you don't have one, you could probably carefully tape everything to the window and get the job done. Light boxes are great for all kinds of stuff, and as with the button shank remover I showed in yesterday's post, they're one of those things you may not use often, but when you need one, you need one. They start at less than $10 for a small plastic sketching surface with a bulb attached underneath (not really a box, but fine for projects like this).
Make sure you sketch a center line so you'll know exactly where to fold the paper. Unpin the design and place it under the paper, lining it up with your sketch, to see if you need to make any adjustments to your sketch.
When you have it like you want it, fold your sketch in half down the center line and cut it out, just like cutting out a Valentine.
Place your template behind the design and hold it up to a light source to make sure you have the shape you want.
And there you have it... a custom template... and a one-of-a-kind finish!
18 May 2016
Finishing Spree: Update #2~Twisted & Pinned Ribbon
More finishes... let's get to it!
This was my first finish of the year and it's a freebie available here (along with several other animal options). This twisted & pinned ribbon technique is one I've shown before, but it's been a while. Very similar to the folded & pinned technique I showed yesterday, this is one of my favorite ways to trim a flat finish. It's quick and easy and there are lots of color options. This 1/4" ribbon comes in regular, picot (with the little loops), and sheer and it's very inexpensive. I think most of the rolls I have were $0.50!
Just anchor the ribbon with a pin, twist it until you have the look you want, and pin. Here's another one:
These little stitching mermaids are from a Sue Hillis booklet called Autumn Stitches. I always keep my eyes open for unusual trim to add to my finishing stash, and when I saw this trim it reminded me of ocean waves.
I have a lot of buttons in my finishing stash, and since I rarely sew them on, I have one of these:
This is a great little tool called a shank remover. The blades are slightly curved so they will lie flush against the back of the button and cut off the shank cleanly. This is one of those tools that you may not need often, but when you need one, you need one!
Today I'll be working on a template tutorial that I hope to have posted tomorrow.
17 May 2016
Finishing Spree: Update #1~Folded & Pinned Trim
I'm on my finishing spree! Just like a crime spree... except not illegal. I've got a ton of finishing to show, so I'll be posting several updates instead of one gigantic post. Stay tuned throughout the week!
My finishing tutorial is here, including an explanation of why I finish everything flat, my tips, and some other thoughts on finishing. Click the "finishing" label to see other stuff. Here we go!
Black Hearted Queen, a freebie that can be found here. The charm is from Hobby Lobby.
A Halloween freebie that can be found here. The fabric is Solar from Picture This Plus.
A bunny freebie that can be found here. It's stitched with Caron Wildflowers in Easter Egg.
And a Christmas ornament from the 2014 Just Cross Stitch Christmas Ornament issue.
Here are a few close-ups of how I do the folded & pinned ribbon/trim. First, anchor the trim with a pin.
Fold the trim (or ribbon) down at an angle and then back up again, pinning at the fold.
Use the width of the ornament as a guide to how deep the folds should be. I like mine to be pretty close to the width of the ornament, maybe just a smidge wider.
Happy Finishing!
My finishing tutorial is here, including an explanation of why I finish everything flat, my tips, and some other thoughts on finishing. Click the "finishing" label to see other stuff. Here we go!
Black Hearted Queen, a freebie that can be found here. The charm is from Hobby Lobby.
A Halloween freebie that can be found here. The fabric is Solar from Picture This Plus.
A bunny freebie that can be found here. It's stitched with Caron Wildflowers in Easter Egg.
And a Christmas ornament from the 2014 Just Cross Stitch Christmas Ornament issue.
Here are a few close-ups of how I do the folded & pinned ribbon/trim. First, anchor the trim with a pin.
Fold the trim (or ribbon) down at an angle and then back up again, pinning at the fold.
Use the width of the ornament as a guide to how deep the folds should be. I like mine to be pretty close to the width of the ornament, maybe just a smidge wider.
Here's how it looks using ribbon.
Happy Finishing!
11 May 2016
The Mind of a Stitcher
First, a finish for my fox Christmas tree. When we got home from Texas last weekend, I was too tired to tackle that last band of snowflakes on Snowfire Christmas, but I didn't want to just sit and stare into space, so I picked up this little guy. I converted this Heritage Crafts kit from a spring design into a winter one by stitching snow instead of grass and adding a snowflake. He's stitched on 28 ct. Dwarf from Picture This Plus.
Now, we have to talk about my brain. Since we got back, it's either been racing like an espresso-drinking squirrel or it hasn't been working at all. Mr. Wonderful suggests that I am over-tired, as we like to say at our house. That's an old-fashioned way of saying, "Stop." So what is my idea of stopping? Attacking my finishing basket, of course!
I've spent the last couple of days going through my finishing supplies and seeing if I needed anything, and shopping for what I needed, and doing errands, and cooking, and doing laundry. Clearing the decks. You know, "stopping." Now that I have everything done (!), I plan to spend the rest of the week (and next week?) finishing and framing. This is a project I've been needing and wanting to do for a loooong time and I'm looking forward to it. Stay tuned for progress updates!
Oh, I'm also hosting a new SAL over on the 123Stitch message board. It starts Monday, 16 May and I'm calling it the ILTWHISI SAL: I Love This Why Haven't I Stitched It? It's to encourage us (me!) to stitch those projects we just love but never seem to get around to stitching because... who knows? So I've been trying to get ready for that, too. Here's how that's been going:
My brain, pondering options for first SAL project:
Fox Forest... I had the fabric... but then I saw something else I might like better, so I ordered it... it's not here yet...
Judith Kirby's Halloween House... I had the fabric... but when I was looking for another fabric for Fox Forest, I saw something else I might like better for Halloween House, so I ordered it... it's not here yet... but if I don't like it better than what I have, I could start... but I need to do a color conversion on the house first...
Le Charabosse by Nimue... I have the fabric and threads... but... no... (of course)
Fox Family... if I don't use the fabric I originally picked out for Fox Forest, I might use it for Fox Family... but I'd have to do a floss toss... but I don't have any of the Dinky Dyes it calls for...
Garden Sampler... I have the fabric, but not the floss... need to order the Valdani for it... maybe if I order it today it will get here before the weekend...
If the fabric order arrives this week, I'll start Fox Forest... but if it doesn't, I'll start Garden Sampler... if the Valdani arrives...
If the fabric order arrives this week, I need a few more colors of Weeks to start Fox Forest... may as well go to my LNS for those... just in case the fabric gets here...
I wonder if my LNS has Dinky Dyes...
I need to think of something for supper...
*****
That's Squirrel Brain. I guess it's better than Not Working Brain, but not by much. Hopefully a few days of playing in my sewing room will do the trick and make me tranquil.
Updates on the finishing/framing project forthcoming... I hope!
Now, we have to talk about my brain. Since we got back, it's either been racing like an espresso-drinking squirrel or it hasn't been working at all. Mr. Wonderful suggests that I am over-tired, as we like to say at our house. That's an old-fashioned way of saying, "Stop." So what is my idea of stopping? Attacking my finishing basket, of course!
I've spent the last couple of days going through my finishing supplies and seeing if I needed anything, and shopping for what I needed, and doing errands, and cooking, and doing laundry. Clearing the decks. You know, "stopping." Now that I have everything done (!), I plan to spend the rest of the week (and next week?) finishing and framing. This is a project I've been needing and wanting to do for a loooong time and I'm looking forward to it. Stay tuned for progress updates!
Oh, I'm also hosting a new SAL over on the 123Stitch message board. It starts Monday, 16 May and I'm calling it the ILTWHISI SAL: I Love This Why Haven't I Stitched It? It's to encourage us (me!) to stitch those projects we just love but never seem to get around to stitching because... who knows? So I've been trying to get ready for that, too. Here's how that's been going:
My brain, pondering options for first SAL project:
Fox Forest... I had the fabric... but then I saw something else I might like better, so I ordered it... it's not here yet...
Judith Kirby's Halloween House... I had the fabric... but when I was looking for another fabric for Fox Forest, I saw something else I might like better for Halloween House, so I ordered it... it's not here yet... but if I don't like it better than what I have, I could start... but I need to do a color conversion on the house first...
Le Charabosse by Nimue... I have the fabric and threads... but... no... (of course)
Fox Family... if I don't use the fabric I originally picked out for Fox Forest, I might use it for Fox Family... but I'd have to do a floss toss... but I don't have any of the Dinky Dyes it calls for...
Garden Sampler... I have the fabric, but not the floss... need to order the Valdani for it... maybe if I order it today it will get here before the weekend...
If the fabric order arrives this week, I'll start Fox Forest... but if it doesn't, I'll start Garden Sampler... if the Valdani arrives...
If the fabric order arrives this week, I need a few more colors of Weeks to start Fox Forest... may as well go to my LNS for those... just in case the fabric gets here...
I wonder if my LNS has Dinky Dyes...
I need to think of something for supper...
*****
That's Squirrel Brain. I guess it's better than Not Working Brain, but not by much. Hopefully a few days of playing in my sewing room will do the trick and make me tranquil.
Updates on the finishing/framing project forthcoming... I hope!
07 May 2016
Saturday Sampler: Texas Edition
I'm back! Mr. Wonderful had to go to Texas for work, so I tagged along to visit my family. This was the little project I took to work on during my trip, Joy Y'all by Redbird Designs.
I changed his eyes, omitting the whites and changing the color from blue to DMC 938, and adding a backstitch above them and a white quarter stitch for a little sparkle. I also fiddled with the structure of the words a bit, but that was just to accommodate the red fiber in the fabric. It's stitched on 28 ct. Newport linen.
Of course, I shopped! We went to my mom's LNS, Stitches From the Heart in San Antonio. New stash from Redbird Designs:
I also found these super cute Texas charms for finishing:
And these tiny sterling silver Texas earrings were a gift from my parents. My dad picked them out at James Avery:
Tiger Lily is very happy to have us home, and we're exhausted, so the three of us are going to spend the weekend recovering!
Happy Stitching!
I changed his eyes, omitting the whites and changing the color from blue to DMC 938, and adding a backstitch above them and a white quarter stitch for a little sparkle. I also fiddled with the structure of the words a bit, but that was just to accommodate the red fiber in the fabric. It's stitched on 28 ct. Newport linen.
Of course, I shopped! We went to my mom's LNS, Stitches From the Heart in San Antonio. New stash from Redbird Designs:
I also found these super cute Texas charms for finishing:
And these tiny sterling silver Texas earrings were a gift from my parents. My dad picked them out at James Avery:
Tiger Lily is very happy to have us home, and we're exhausted, so the three of us are going to spend the weekend recovering!
Happy Stitching!
28 April 2016
Snowfire Christmas Update #2
Thanks so much for the kind words about Snowfire Christmas, and about my homemade stitch diagram. That was a first for me, and it's gratifying to know it was helpful to some.
Here's where I am as of last night... I'm so close, y'all!
In choosing the color for the words, I fiddled with all of the colors in the sampler: a paler shade of grey, white, two shades of green, two shades of red. I wanted the words to blend in to the sampler instead of dominate it, so I chose the darker grey. I also toyed with the idea of using a more elaborate alphabet and stitching the words over one, but I decided I enjoy being sane and opted for a simpler alphabet stitched over two. I'm so glad I did, because just stitching the "and" over one was plenty of over one stitching for me.
So. teeny.
I had a great deal of assistance from the Stitchy Supervisor while working on this section. Not sure how I could have done it without her. Standing on the chart:
Lying down on the chart:
Dozing off on the chart:
Baffing on the chart:
Making sure the chart is marked correctly:
Such a lot of supervising.
I hope, hope, my next update will be a finish. I'm going out of town on Saturday and wanted to have this WIP done before I leave, but there's a row of elaborate beaded snowflakes standing between me and the finish. We'll see. Stay tuned!
Here's where I am as of last night... I'm so close, y'all!
In choosing the color for the words, I fiddled with all of the colors in the sampler: a paler shade of grey, white, two shades of green, two shades of red. I wanted the words to blend in to the sampler instead of dominate it, so I chose the darker grey. I also toyed with the idea of using a more elaborate alphabet and stitching the words over one, but I decided I enjoy being sane and opted for a simpler alphabet stitched over two. I'm so glad I did, because just stitching the "and" over one was plenty of over one stitching for me.
So. teeny.
I had a great deal of assistance from the Stitchy Supervisor while working on this section. Not sure how I could have done it without her. Standing on the chart:
Lying down on the chart:
Dozing off on the chart:
Baffing on the chart:
Making sure the chart is marked correctly:
Such a lot of supervising.
I hope, hope, my next update will be a finish. I'm going out of town on Saturday and wanted to have this WIP done before I leave, but there's a row of elaborate beaded snowflakes standing between me and the finish. We'll see. Stay tuned!
26 April 2016
Snowfire Christmas Update
I set a goal for myself to finish my two main WIPs before I allowed myself any new starts. After finishing Woodland Sampler, I turned my attention to Snowfire Christmas. If you're just joining me, this is a Just Nan sampler that I've changed the fabric and colors on and converted to my wedding sampler. I finished a couple more bands and have started stitching our names and wedding date. I so wish y'all could see this sampler in person.
Robin in Virginia asked a question about how to do the Rice stitch variation (second to last band). I searched for a diagram of this particular variation--there are so many--but I couldn't find one exactly like it. Rather than post a picture of the stitch diagram on the back of the chart (copyright violation?), I just decided to make my own. It's not very sophisticated, but hopefully it gets the information across. I intentionally photographed the stitches in low light because it makes them easier to see.
To make it easier to follow the progression of the stitch, I drew the various sections on separate stitches... otherwise it would have looked like a blob of pink lines!
From left to right:
1) The first part of the stitch is a large cross stitch, 3 stitches high x 3 stitches wide (when stitching over two). The first leg of the stitch is top left down to bottom right; the second leg of the stitch is top right down to bottom left.
2) The corners are stitched in the order they are shown: top left, bottom left, bottom right, top right. The individual stitches are stitched shortest to longest.
3) The last element of the stitch is the "+" over the center of the large cross stitch. The vertical stitch is done first, top to bottom; the horizontal stitch is done last, left to right.
Clear as mud? It's really not a difficult stitch, just a bit tedious when you're doing a million of them. If my instructions are lacking--and I'm sure they are--I think once you start fiddling with the real thing, as opposed to just reading about it, you'll get it.
I'm doing our names and wedding date now, and after that all that will be left is another row of big, sparkly snowflakes. So close...
Robin in Virginia asked a question about how to do the Rice stitch variation (second to last band). I searched for a diagram of this particular variation--there are so many--but I couldn't find one exactly like it. Rather than post a picture of the stitch diagram on the back of the chart (copyright violation?), I just decided to make my own. It's not very sophisticated, but hopefully it gets the information across. I intentionally photographed the stitches in low light because it makes them easier to see.
To make it easier to follow the progression of the stitch, I drew the various sections on separate stitches... otherwise it would have looked like a blob of pink lines!
From left to right:
1) The first part of the stitch is a large cross stitch, 3 stitches high x 3 stitches wide (when stitching over two). The first leg of the stitch is top left down to bottom right; the second leg of the stitch is top right down to bottom left.
2) The corners are stitched in the order they are shown: top left, bottom left, bottom right, top right. The individual stitches are stitched shortest to longest.
3) The last element of the stitch is the "+" over the center of the large cross stitch. The vertical stitch is done first, top to bottom; the horizontal stitch is done last, left to right.
Clear as mud? It's really not a difficult stitch, just a bit tedious when you're doing a million of them. If my instructions are lacking--and I'm sure they are--I think once you start fiddling with the real thing, as opposed to just reading about it, you'll get it.
I'm doing our names and wedding date now, and after that all that will be left is another row of big, sparkly snowflakes. So close...
23 April 2016
Saturday Sampler: Azalea Edition
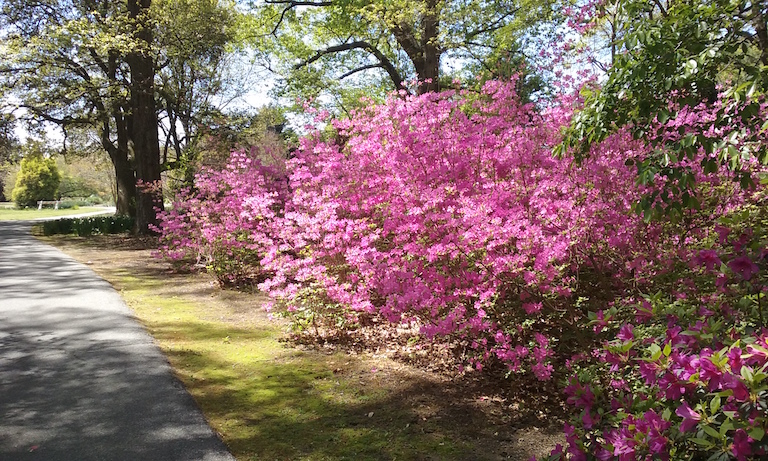
Last Saturday, Mr. Wonderful and I went for a quick weekend away. We spent a lot of time bundled up on a freezing cold beach watching the sea (okay, not technically freezing, but really cold) and at the Norfolk Botanical Gardens in Norfolk, VA. The azaleas were losing their minds.
And one of my favorites... looking up at the sun through the lacy foliage of a Japanese Maple. I'm going to have one of these someday.
So that was last Saturday. This Saturday I'm back to my Wedding Sampler after a (way too long) break. I'm tackling a band of modified Rice stitches. Three down, a zillion more to go.
I have moral support at the ready.
Happy Saturday, and Happy Stitching!
And one of my favorites... looking up at the sun through the lacy foliage of a Japanese Maple. I'm going to have one of these someday.
So that was last Saturday. This Saturday I'm back to my Wedding Sampler after a (way too long) break. I'm tackling a band of modified Rice stitches. Three down, a zillion more to go.
I have moral support at the ready.
Happy Saturday, and Happy Stitching!
Subscribe to:
Posts (Atom)