30 July 2016

The Keeping Christmas Project


“I will honour Christmas in my heart, and try to keep it all the year."

~Charles Dickens, A Christmas Carol


I have been feeling increasingly weighed down lately by the things going on in my country and in the rest of the world. I find myself not wanting to look too far forward, in apprehension of what may be coming. A few days ago, while going through a stack of my Christmas designs, I had an idea for a project to lift my spirits and keep me looking and moving forward, focused on the JOY and BLESSINGS in life. 

If you've been visiting my blog for a while, you know I love Christmas and stitching Christmas ornaments. I've shown all my stitched ornaments, and the Christmas tree they decorate (if you need to catch up, click on any of the Christmas labels in the right sidebar). So I have quite a stack of ornament-sized designs... not to mention every issue of the Just Cross Stitch Christmas Ornament issue. 

While looking at my collection--and chastising myself for not having more of them stitched--my mind wandered (as it often does) to wondering how many I could get done before Christmas. This led me to check a calendar to see how many weeks it is until Christmas (21, if you were wondering, too). Then I started daydreaming about how cool it would be to stitch an ornament every week until Christmas. And I connected that to how I've been feeling lately, and thought what a great way that would be to push back against the negative thoughts and emotions I've been having.

Naturally, I would have to blog my progress. Then I started worrying about not being able to get an ornament done every week. And about what to call it. A Christmas ornament "challenge"? I pondered all this for a day or two and realized that stressing over how many ornaments I could actually get done and calling it a "challenge" were both the wrong approach. The goal is to focus on JOY and BLESSINGS... not to freak out over finishes and certainly not to consider it a "challenge" (too much pressure!). 

And so, "The Keeping Christmas Project" was born: a leisurely, five-month stroll toward Christmas, stitching as many ornaments as I can along the way. Will I stitch 21 ornaments by Christmas? Nope. Do I care? Nope. My Keeping Christmas Project is already fulfilling its purpose. I'm looking forward to stitching some beautiful ornaments and sharing them here, hopefully bringing a little joy (and enabling) to others as well. I am already pushing back, and it feels good.

This isn't a challenge or a SAL, but if you'd like to join me--in a leisurely, no-stress-allowed way--please do! Leave a link to your blog in the comments so I can see your ornaments.

Here's a start, a freebie available here.


Merry Christmas, y'all!

23 July 2016

A Fox Forest Finish!

Finished last night! Stitched with suggested Weeks (with the addition of GAST Oatmeal) on 28 ct. PTP Sand.

I also slightly changed the border, stitching it with Caron Wildflowers in Moss. Wildflowers does the prettiest job for this type of border, if you ask me.

On to Halloween!

20 July 2016

Closing in on a Fox Forest finish

All the little foxes are present and accounted for. All that's left is a tree and the border.

A few details: satin stitched trees, smyrna cross eyes and nose, and Rhodes stitch flower centers.

Hoping to finish this up this weekend. My next project is a classic Halloween design and it's calling my name!

12 July 2016

Fabric Hoard Update!

*sigh*

I confess. I did it. I bought more fabric. And I'm not even sorry. I'd do it again. And I will do it again during the Picture This Plus Christmas in July sale later this month. And I won't be sorry for that, either. My fabric hoard is gradually out-growing the storage spot I've assigned to it, so I'm going to have to do some re-arranging in my sewing room to accommodate it. 

My latest haul is a selection of Wichelt hand-dyed Jobelan. I have very little Jobelan in my stash, but I couldn't resist these scrumptious colors. Left to right: Sandcastle, Bittersweet, Watercress, Babbling Brook, Cornflower, Stormy Grey, Dense Fog

See, here's what happened. I found a really cool fox design on Etsy, and I bought it. It's full of unusual colors (for a fox design) and the fabric selection was going to be tricky. I pretty much never stitch on white or ivory, so that was out. A neutral, like a raw/natural linen, seemed a little "blah" for this design, but because it's "busy," I'd have to be careful choosing a hand-dyed fabric with too much mottling. I just happened to stumble across Bittersweet, the soft orange second from the left. Here's a partial floss toss:

I think it'll be pretty. But it's the next next project after I finish Fox Forest, so y'all will have to wait to see what it is.

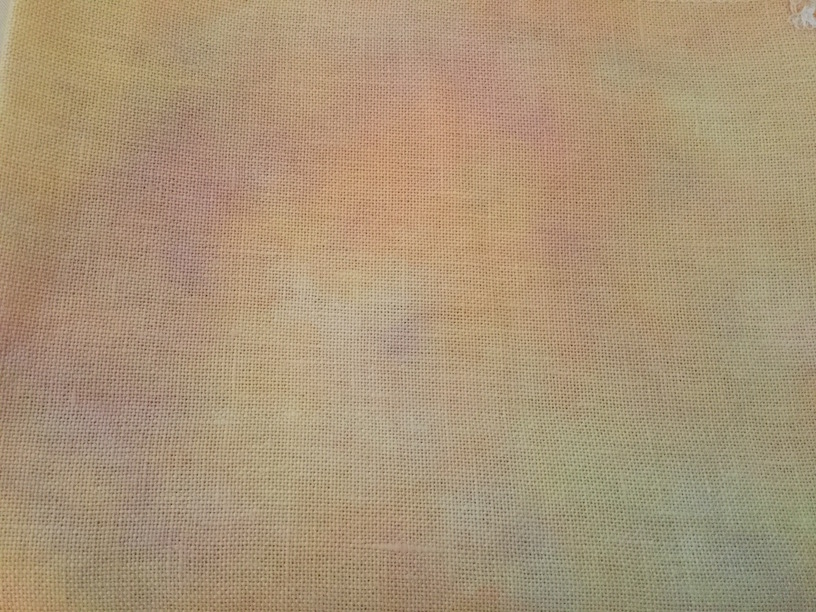
I also tried a new-to-me fabric dyer, Hand Dyed Fabrics by Stephanie. I placed a small order (three colors) and am happy with the fabric. In fact, I think I'll be using one of her fabrics for my next project. Here's an interesting color that I bought just because. It's called Melody and has soft shades of lots of colors. Not sure what I'll do with it, but I'll find something! Be aware that it takes a while to receive an order (as she says on her website).

My LNS finally got the "new" DMC Coloris floss! It's not really "new." DMC rolled this new floss out last year in Europe and it has taken this long to show up in the US market. I've been waiting and waiting! Twenty-five colors that are a little different from other variegated threads as each color is a mix of four DMC solid colors. I picked a few of my favorites.

And finally, a progress update on Fox Forest.

I would love to be able to get to the border by this weekend, but that might be a little too ambitious for this week. It's coming along quickly, even though I've only worked on it on weekends. 

Happy Stitching!

29 June 2016

Fox Finds... and shopping tips!

At this time of year, I pop in to Hobby Lobby about once a week. Even though it's not even July, they have already begun putting out fall and Christmas items. I know a lot of people complain about it being "too early", but I love it. Summer is #4 on my list of favorite seasons, so the appearance of fall (#1!) stuff is always welcome to me. It's nice to be able to buy supplies/decorations early and get to work on projects. If they didn't put out fall stuff until September, or Christmas stuff until after Thanksgiving, there would be such a rush to get things done in time. This way, the work (and the expense!) can be spread out over several months, and by the time cozy fall and merry Christmas roll around, all of those projects are done. That's the way I like to do it, anyway. 

I'm often asked where I've found things that I show on my blog, and more often than not, the question is about something Christmas-related I've shown, usually in November or December posts. My answer is almost always the same: "Hobby Lobby (or some other craft store), last July." If you want a nice selection of goodies, especially Christmas ones, you have to shop in the summer, right as the retailers are unpacking their boxes. They won't restock seasonal items over and over. What they get is what they get, and when it's gone, it's gone. I can't tell you how many times I've spotted some neat Christmas item in July, snapped it up, and by the beginning of September it's no longer to be found. 

All of which brings me to why I just bought Christmas ornaments in June. TA-DA!

I was too excited to find these at Hobby Lobby! They're perfect for my fox Christmas tree

I also found this cool metal wall art there. I can see him with leaves entwined around his ears in the fall, holly at Christmas time. An interesting alternative to a wreath.

And this!

Pretty big day at Hobby Lobby. And since we're on the topic of foxes, here's my progress on Fox Forest (The Work Basket). I'm stitching it with the recommended Weeks, with the addition of GAST Oatmeal, and only a few other minor changes. It's on PTP Sand.

Bonus Tiger Lily:


23 June 2016

School Supplies = Stitchy Supplies

I must confess. I'm 44 years old and I still love school supplies. Pretty soon, stores will dedicate aisles and aisles to school supplies, and there I will be, happily wandering up and down them, putting goodies into my basket. It's even more fun when you don't actually have to attend school. Once I got my degree, that was it for me... although I did take Chinese a few years ago, but that was for fun. Anyway, every year I look forward to school supply season, and I almost always find something that can be used for stitchy purposes.

I was in Wal-Mart the other day and discovered they have a new line of containers for craft storage. This one was only $3 and is the perfect size for some basic stitching tools or to hold the floss bobbins for a project. Like most of you, I have lots of stitchy toys but really there are only a few things I use every time I stitch. Although I have multiples of everything--needle packets, threaders, counting pins, scissors, etc--I like to keep one basic set together in one container and move it from project to project, instead of having a set of tools with each project. I usually switch out my tools for the seasons, so I'll have a Christmas set, a fall set, a spring or summer set. This little box is just right for my stuff, and I'll be getting a few more to hold floss bobbins for projects.


This is a zippered metal pencil case I've had for a long time that I use to hold my needle minder collection. It's very compact and is a great way to store a bunch of them in a small space. School supply sections have tons of small containers that are ideal for storing stitching supplies. You can find all sorts of little boxes and bags and cases and they're usually pretty cute.


Last year I picked up this little pencil bag for $1 and stocked it with a few basic tools for stitching; it also holds a 6" Q-snap. It stays loaded, so it's easy to grab and throw in a bag for stitching on the go. I took it with me on my trip to Texas and it was perfect. Fits easily into any bag--even a largish purse--and your project is protected in the zipper pocket.

For finishing round ornaments, if I don't have a round template the right size, I use a compass to draw one. I also use a compass to draw a diameter guide when I'm making bows, as I showed in this post. I got a pretty nice one for a good price on clearance, but you'll easily be able to find inexpensive ones among the school supplies. 

School supply season is nearly upon us... keep your eyes open to the possibilities for re-purposing things for stitchy uses and I bet you'll be able to find some things you didn't even know you needed!

16 June 2016

Garden Sampler finish!

Finished Garden Sampler (link to design in previous post). Now I can start Fox Forest... Yippee!

Speaking of foxes, did you notice what I slipped in there?


11 June 2016

Saturday Sampler: Stitchy Edition

Here's what I've been working on for the last few weeks. This is Garden Sampler by Karen Kluba, stitched with Valdani on PTP Valor. It's available here. The only change I made was to omit the quote and reconfigure the bottom border to match the other three sides.

Speaking of Picture This Plus, I've been on a hunt for a really good neutral fabric with an aged look. I just got an order from them this week with a couple of possibilities. Added to the others I've collected recently, this is what I've got so far.

Left to right:
Carmel Macchiato from Hand Dyed Fabrics by Stephanie
Vintage Butter Pecan from Lakeside Linens
Sand from PTP
Legacy from PTP
Wren from PTP

Haven't chosen a favorite. They're all so different and I can see using all of them, but I'll be using Sand for my next project--Fox Forest by The Workbasket--which I hope to start this weekend after I finish up Garden Sampler. And even though it's over a month away, I'm already starting to plan for the big Picture This Plus sale in July. I've made one decision already, that I'll be getting a piece of Loch for this cool design I just got.

I also just got a bunch of Caron Wildflowers, which I'm thrilled with! A fellow stitcher was selling her collection at a discount, so I bought a few. If you're new here, it's my favorite fiber. I just love the stuff.

And last, but far from least, a glamor shot of the Stitchy Supervisor. She's been on sickroom duty this week, bless her heart. I--who never get sick--was super sick this week... and of course Mr. Wonderful was out of town! So Miss Tiger Lily was acting nursemaid. She stuck to me like glue. What a sweetie.

Have a great weekend!

02 June 2016

Q-Snap Storage & A Travel Light Review

I love, love, love Q-Snaps. I have them in every size--more than one set in each size--plus extenders, and with them I can make frames of any size, from 6" to 20" and everything in between. But this is not a great way to store them:

Sadly, my Q-Snap collection has been living in a box for quite a while, and digging through it to find the right size combinations hasn't been fun. I kept thinking there had to be a better way to store these things, and finally hit upon it a couple of days ago. An over-the-door shoe organizer... TA-DA!


My larger sets are stored elsewhere; oddly, the larger ones are easier to store. I use the smaller sets more often anyway, and this will make constructing the right size frame for my projects so much quicker and easier. Bonus: room to store other stuff that's been taking up valuable space elsewhere. Happy!

The other thing I wanted to share was my discovery of this awesome travel light for stitching. I've had it for a while but wanted to give it a test run on a trip before I showed it here and recommended it. For some time, I had been looking for a good light to take on trips. I wanted it to be small and light weight, with the option to use either battery power or a plug. This is the Naturalight Smart Lamp R10 rechargeable LED light, which I got on Amazon. In addition to the internal rechargeable battery, it also has a plug-in power supply and a USB cable, and a 3 step dimmer. I used it for several long days of stitching while I was in Texas and found it had a good battery life; I just plugged it in to recharge at the end of the day when I finished stitching. As you can see, it's so small it will fit into a project bag.


The two complaints I saw most often in the Amazon reviews were that it is so light it's easily knocked over, and that the power button is very sensitive and is too easily turned on by mistake. Meh. Some folks will complain about anything. This is a great stitching light for travel. 

27 May 2016

Finishing Spree: Update #7~Made it to the bottom of the basket!

Ten days and 19 finishes later... I'm done! Whew! Here are my last few finishes.

This is a small part of Antique Bee Sampler by Elizabeth's Designs. I went a little crazy with the embellishing on this one, but it was fun.


This little sheep is a freebie from Just Cross Stitch, available here.

Another freebie, available here.


And yet another old freebie, which I don't think is available anymore.


And that's it! From this...

...to this!

Thank you to all who have left such kind comments and followed me through my finishing spree! I hope you've enjoyed it and perhaps picked up an idea or two. Finishing is fun and it doesn't have to be difficult or expensive. But I don't recommend leaving your finishing to pile up for a few years!

And now for the framing...

...but first, a break!

Thanks, y'all! Happy Stitching & Finishing!

26 May 2016

Finishing Spree: Update #6~How to build a bow

Still with me? See, this is what happens when you neglect your finishing for--ahem--a very long time. A large pile of finishes falls on you and you have to dig yourself out. I'm still digging...

An old La D Da freebie, available here.


A Halloween ornament for Mr. Wonderful from the 2014 Just Cross Stitch Halloween issue.


And a Primitive Bettys freebie, available here.

Last fall I posted a few pictures of how I make what I like to call a big splashy bow, which you can see here. Now, y'all have probably noticed from all of these finishing pictures that I'm not wild about bows. I use them occasionally, but they're not my favorite thing. And I really am not a fan of "perfect" bows. I like my bows to look hand-tied (not clipped and sewn) and I like my splashy bows to be slightly messy. As I said in the post I cited above, I think the randomness of the bow is a nice contrast to the precision of the stitching. That being said, sometimes you need to make a bow that's slightly less wild than the one I linked to. You may want it more compact or a certain size. So here's how I make a Big But Slightly Less Splashy Bow.

If you don't have a compass, treat yourself to one (school supply section; they're inexpensive). If you do any amount of finishing you'll find one very useful. Not only can you make perfect round templates in any size, but you can use one for this little trick. After you've decided the diameter of the bow you want to make, draw a circle of that size on a piece of foam core. This will be your guide for how big to make the bow.

 Use a pin to poke a hole through the foam core at the point left by the compass in the center of the circle, remove it and then poke a threaded sewing needle through the hole from back to front. Don't pull the needle all the way through the foam core; rather, let the foam core hold the needle upright. This will allow you to use both hands to thread the ribbon onto the needle.

Start building the bow by looping ribbon over onto the needle, using the circle as a guide to how wide the loops should be. 


When you have the bow as big as you want it, carefully pull the needle through the foam core and knot the thread. You can use a clothespin to hold the bow together on the needle while you're knotting the thread. When the thread is secure, pull the needle through the bow and put a couple of stitches through the bow to secure it.

Finish the center of the bow with another smaller bow (as in the linked example), a charm, or a button.

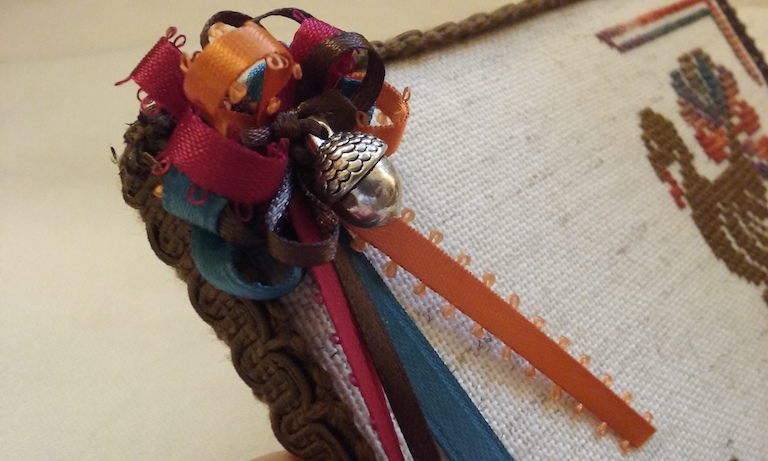
And one more thing... these tail feathers! This old boy's tail is stitched with Caron Wildflowers in Fiesta and I couldn't resist showing you a close-up of the beautiful colors in this thread.